Port Mirroring Configuration: Step-by-Step Switch Setup
Published
- switch port mirroring
- port mirroring configuration
- configure port mirroring
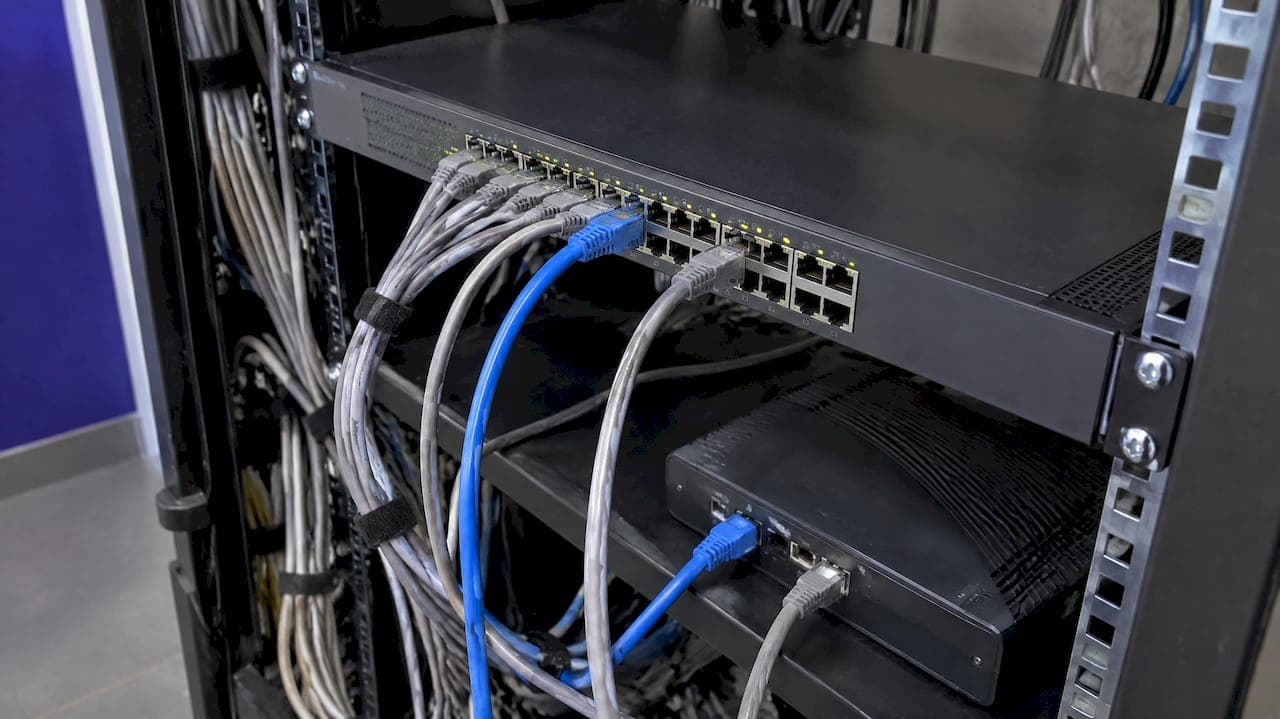
Port mirroring configuration comes down to four settings on a managed switch: a destination port, one or more source ports (or a VLAN), a direction (ingress, egress, or both), and a saved, verified session. The switch then copies the selected traffic to the destination port, where a packet analyzer, IDS, or monitoring probe reads it. Original traffic keeps flowing normally. This guide shows the workflow, the CLI patterns for common switch families, and the mistakes that cause empty captures.
TL;DR
- Port mirroring copies traffic from source ports to one destination port so an external analyzer can inspect it, without changing how the original packets are delivered.
- Every configuration needs the same four things: destination port, source ports or VLAN, direction (rx, tx, or both), and a saved config.
- The destination port cannot also be a source, and you should confirm the session with the switch's show command before capturing.
- Mirroring uses switch resources, so turn it off when the investigation ends.
- For permanent, full-fidelity visibility, a hardware probe is often a better fit than a long-running SPAN session.
Table of Contents
- What port mirroring does and when you need it
- Before you configure: plan the session
- Port mirroring configuration step by step
- Example configurations by switch family
- Local, remote, and encapsulated mirroring
- Limitations and troubleshooting
- Security and operations practices
- When SPAN is not enough
- Our perspective
- Put always-on visibility behind your captures
- FAQ
- Sources
What port mirroring does and when you need it
A switch normally forwards a frame only to the port where the destination device sits. That is why plugging a laptop into a spare port shows you almost nothing useful. Port mirroring changes that. NETGEAR explains that it copies traffic from selected source ports to a destination port for analysis by an external network analyzer, and that it is used for monitoring, diagnostics, debugging, and helping fend off attacks. A session can have several source ports but only one destination port, and it can mirror received traffic, transmitted traffic, or both.
Huawei's documentation adds that mirroring does not change normal packet processing. Your users and servers see no difference. Arista describes a mirror session as an association between source ports and a destination port, and frames it as a hardware facility suited to probes, intrusion detection, latency analysis, and packet capture.
Common reasons to set it up:
- Capturing a problem flow in Wireshark when a user's application is slow or failing.
- Feeding an intrusion detection system with a copy of server or uplink traffic.
- Recording VoIP calls or analyzing jitter on a voice VLAN.
- Verifying what a device is really sending, such as DHCP requests or unexpected broadcasts.
Mirroring is not port forwarding
The two are often confused because both involve "ports." Port mirroring duplicates Layer 2 traffic on a switch so you can observe it. The original packets keep their source and destination. Port forwarding is a NAT feature on a router or firewall that sends inbound traffic for a given external port to a specific internal IP address and port. Forwarding changes where traffic goes. Mirroring only copies it.
Before you configure: plan the session
Five minutes of planning prevents most failed captures.
- Confirm the switch supports it. Managed and smart-managed switches usually do. Unmanaged switches do not.
- Pick the destination port. Use a physical port that is free and dedicated to the analyzer. It cannot also be a source port, as TP-Link's configuration guide states.
- Choose sources. A source can be a single port, several ports, a link aggregation group (LAG), or on many platforms an entire VLAN. Fewer sources means less load and cleaner captures.
- Choose direction. Use rx for traffic entering the source, tx for traffic leaving it, or both. Both is the default choice for troubleshooting a single host.
- Check bandwidth. A full-duplex 1 Gbps source can produce up to 2 Gbps of mirrored traffic in "both" mode. If the destination is also 1 Gbps, frames can be dropped. Mirror one direction, or use a faster destination link.
- Record the change. Note who enabled the session, why, and when it comes down.
Port mirroring configuration step by step
The syntax differs by vendor, but the workflow is the same. The commands below are representative patterns. Check your model's guide for exact keywords.
Step 1: Define the destination port
The destination is where your analyzer plugs in. On TP-Link managed switches, you set one destination port for the monitor session, then add sources. On Cisco Catalyst switches, both ends are defined inside a monitor session.
Step 2: Add source ports or VLANs
On TP-Link, source interfaces can be ports, LAGs, or the CPU, and each one is set to rx, tx, or both. Cisco SPAN lets the source be an interface or a VLAN, with transmitted, received, or both directions forwarded to the destination.
Step 3: Set the direction
Choose the direction per source. Capturing a client's problem? Use both. Watching for inbound attacks on a server port? Start with rx. Hunting for a device that floods the network? Use rx on the uplink side where that device connects.
Step 4: Verify the session
Never assume it worked. Run the platform's show command. On TP-Link, use show monitor session to confirm the destination and sources. Then plug in the analyzer and check that frames from a known source actually appear.
Step 5: Save the configuration
If the mirror is meant to survive a reboot, save it. TP-Link's guide uses copy running-config startup-config for this. If it is a temporary capture, skip the save so a reboot clears it, and you cannot forget it is running.
Example configurations by switch family
Cisco Catalyst (SPAN)
Cisco calls its implementation SPAN (switched port analyzer). A basic local session looks like this:
monitor session 1 source interface Gi1/0/5 both
monitor session 1 destination interface Gi1/0/24
show monitor session 1
To mirror a whole VLAN instead, use monitor session 1 source vlan 20 rx. Remove the session with no monitor session 1 when finished. The Cisco IOS SPAN walkthrough covers these options and the behavior of the destination port.
TP-Link managed switches
TP-Link's CLI uses a monitor session with a destination and sources, verified with show monitor session and saved with copy running-config startup-config. Its published guide walks through both the web interface and the CLI.
Other vendors
Huawei, Arista, NETGEAR, Sophos, and others follow the same model under names such as observing port, mirror session, or monitor session. Huawei's configuration documentation describes local mirroring to an observing port, and Sophos documents a CLI example for its switches where an endpoint on one port monitors traffic on another. Find the term your vendor uses, then apply the four settings above.
Local, remote, and encapsulated mirroring
The analyzer is not always in the same closet as the traffic you need.
| Type | Where the analyzer sits | How copies travel | Typical use |
|---|---|---|---|
| Local (SPAN) | Same switch | Directly to the destination port | Standalone troubleshooting at one switch |
| Remote (RSPAN) | Another switch in the same Layer 2 domain | Dedicated mirror VLAN across trunks | Central analyzer for several access switches |
| Encapsulated remote (ERSPAN) | Anywhere reachable by routing | Wrapped in GRE and routed | Central or cloud analyzers, remote security teams |
With RSPAN, Cisco's model uses a dedicated VLAN to carry mirrored traffic from the source switch to the switch holding the destination interface. That VLAN must be allowed on every trunk in between, which is a frequent source of missing captures. ERSPAN wraps the mirrored frames for transport across routed networks. It depends on platform support, so confirm your switch model supports it before designing around it.
Remote mirroring also adds load. Mirrored frames consume trunk bandwidth alongside production traffic, so size links accordingly.
Limitations and troubleshooting
Mirroring is a diagnostic tool. Huawei notes that it consumes device bandwidth and may degrade service-processing performance, and it recommends disabling it when it is no longer needed. Treat each session as temporary unless you have sized the hardware for it.
If the capture is empty or incomplete, work through this list:
- No frames at all. Run the show command again. Is the session active? Is the destination port administratively up, and is the analyzer's NIC in promiscuous or capture mode?
- Destination also listed as source. This is not permitted. Move the analyzer to a different port.
- Missing one direction. Check that the source is set to both, not rx or tx only.
- Dropped frames on busy links. The destination link is oversubscribed. Mirror fewer sources, one direction, or use a faster destination.
- VLAN tags missing or unexpected. Behavior depends on the platform and destination port settings. Check the vendor guide for tag handling.
- RSPAN shows nothing. Verify the mirror VLAN exists on both switches and is permitted on all trunks between them.
- Another session conflicts. Many switches limit the number of sessions, and a port may only belong to one session at a time.
- Errored frames not visible. Many switches do not mirror frames that fail integrity checks, so a SPAN session can hide the physical-layer errors you are chasing.
For how SPAN compares to inline TAPs on accuracy and packet loss, see our guide on TAP vs SPAN.
Security and operations practices
A mirrored port carries a full copy of production traffic, including anything unencrypted. Treat the destination port and the analyzer as sensitive.
- Put the analyzer in a secured location and restrict who can reach it.
- Limit who has permission to change monitor sessions on switches.
- Document every session with an owner and an end date.
- Remove sessions when the investigation ends, and audit configs for forgotten ones.
- Keep captures only as long as needed, since they can contain credentials and personal data.
Teams that place sensors in security-sensitive segments should read our notes on network sensor placement.
When SPAN is not enough
SPAN is quick and free, which makes it ideal for one-off troubleshooting. It becomes harder to run when you need continuous visibility across many sites, or when switch CPUs and mirror session limits get in the way. Multi-site teams and MSPs also face a practical problem: someone has to log in to each switch, configure the session, and remember to remove it.

A dedicated probe at the edge removes most of that. Our article on hardware-driven network monitoring explains how on-site sensors keep visibility running without repeated switch changes. For rollout planning across locations, see how to deploy network probes with checklists, and for a view of what that visibility gives support teams, read about network visibility benefits.
Our perspective
We see the same pattern across MSPs and multi-site IT teams. Someone configures a SPAN session during an outage, captures the packets, solves the problem, and moves on. Months later the session is still running, nobody remembers who set it up, and the switch is carrying a duplicate stream of traffic for no reason.
Port mirroring is a good tool for a single investigation. It is a weak foundation for ongoing monitoring across dozens of locations, because it depends on a person logging into a device at the moment something breaks. By then the evidence may be gone.
That is why we built Netverge around always-on visibility. Vergepoints sit on site and watch the network continuously, sensors feed one platform, and AI agents correlate what they see with documentation and tickets in a knowledge graph. When an alert fires, the context is already there. You do not need to reconfigure a switch to find out what happened.
Use mirroring when you need a packet-level look at one port. Use a unified platform when you need to know about the problem before the user calls.
Jim
Put always-on visibility behind your captures
Netverge unifies monitoring, documentation, ticketing, and automation for MSPs and multi-location enterprises. The Starter Package is $299 per month, and Hardware Vergepoints for on-site visibility are $49 per month per device. Software Vergepoints are $29 per month per Vergepoint. Review the full pricing guide, estimate your own cost with the pricing calculator, or see the Vergepoints hardware.
Ready to see it on your own network? Start your free trial or request a demo from the Netverge team.
FAQ
What is the difference between port mirroring and port forwarding?
Port mirroring copies traffic on a switch to a monitoring port, leaving the original packets untouched. Port forwarding is a NAT function that directs inbound traffic for a specific port to an internal IP address and port. One is for observation, the other for reachability.
Can the destination port also be a source port?
No. On supported switches, the destination port cannot also be a source. Use a dedicated, free port for the analyzer and verify the session with the show command before you capture.
Does port mirroring slow down the network?
It can add load. Huawei states that mirroring consumes device bandwidth and may affect service processing, so keep sessions narrow and disable them when finished. Mirroring fewer sources or one direction reduces the impact.
Can I mirror an entire VLAN?
On many platforms, yes. Cisco SPAN accepts a VLAN as a source, and the destination receives copies from all ports in that VLAN. Check your switch's documentation, since support and limits vary by model.
How do I turn port mirroring off?
Remove the monitor session from the configuration. On Cisco, that is no monitor session 1. Then confirm with the show command that the session is gone, and save if you had saved the original.
Sources
- NETGEAR Support: What is port mirroring and how does it work with a fully managed switch
- Huawei: What Is Mirroring? How Does Port Mirroring Work?
- Arista: Introduction to Port Mirroring
- TP-Link: Mirroring Traffic configuration guide
- Cisco IOS SPAN and RSPAN
- Sophos Switch: Configure port mirroring